Host a Server
So you want to host a Unitystation server? That's awesome! Let me guide you through the process step-by-step in this article. There are several options for hosting your server, so make sure to jump to the section that best fits your situation.'
Appearing in the Server List
Currently, Unitystation staff manually curates the server list to ensure that all servers listed are safe for players. While we are working on enabling anyone to appear on the server list in the future, we must ensure that any risks associated with that openness are mitigated to prevent possible malicious attacks that may affect our players. If you would like to be whitelisted, please contact us on our Discord server.
I Just Want to Play With Friends
Good news, it's pretty easy to set up! The Unitystation client doubles as a server, so you can host and play using a single instance of the game on your own computer.
To do this, you'll need to make sure you've opened 7777 port on your router to allow incoming connections. The specific steps to achieve this depend on your router brand, among other factors, so you'll need to do some googling. Try searching for "Portforwarding [YOUR ROUTER BRAND]" to get started.
After the port forwarding is done, just follow these steps:
Run StationHub Launcher

Go to Installations tab
From here you can run any version of the game you have downloaded without joining a server. If your installations tab is empty, try joining a server first to get their version of the game or manually find the version you want from our CDN following this pattern: https://unitystationfile.b-cdn.net/UnityStationDevelop/{PLATFORM}/{VERSION NUMBER}.zip where {PLATFORM} can be one of "linuxserver", "StandaloneLinux64", "StandaloneOSX" or "StandaloneWindows64". We apologize for any inconvenience caused by the current distribution method, but we plan to improve it for servers in the future.
Click on Launch on the selected version of the game.

Once inside the game
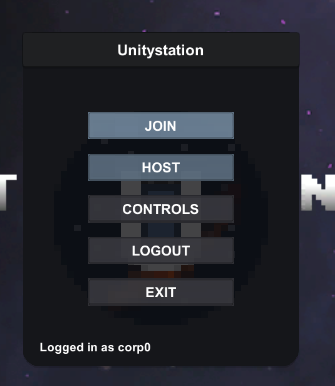
Simply click on HOST and that's it! Yeah, really! Now you just need to give your friends your public IP and make them launch the game following steps I to II but choose JOIN instead in the third step and fill in the given public IP and the 7777 port.

I Want to Host a Dedicated Server
Hosting a dedicated server is also straightforward. Technically, you can just use whatever version you downloaded and run it with the --nographics argument. However, the preferred method, and the one we'll be discussing in this article, is using Docker.
Docker is a platform for running applications in containers, which makes it easy to manage and deploy your server. We will be also including an optional step in this guide to have a web graphical interface so you can manage your server with even more ease!
Download and Install Docker
You can get Docker from its official website. The Ubuntu installation guide is pretty good as well, so you can use that if it is your server distribution or use it as a starter.
Use a Docker Compose file
These configuration files make it easy to download, run, and publish any application distributed as a Docker image. To get started create a docker-compose.yml file somewhere in your server. Use the following simple example as a guide for yours:
version: "3.7"

services:
  unitystation:
    image: unitystation/unitystation:stable
    ports:
      - 7777:7777/udp
      - 7777:7777/tcp
      - 7778:7778/tcp
    environment:
      SERVER_NAME: Unitystation - EU02 Staging
      HUB_USERNAME: YOUR_USERNAME
      HUB_PASSWORD: YOUR_PASSWORD
    labels:
      - io.portainer.accesscontrol.public
    volumes:
      - /root/staging/admin:/server/Unitystation_Data/StreamingAssets/admin
Don't let it intimidate you, we will explain now what matters the most in there.
image key determines what version of the game will be used. You can replace stable with a build number if you want to use a specific version or leave it as stable to be on the latest available version. If you want to be on the absolute latest version, on par with our Staging Servers, you can use develop instead. Find all the versions we have published so far on our Docker Hub page
if you do have hub credentials provided by Gilles over Discord (see above to read about it), you can set the following environmental variables in your docker-.compose file:
SERVER_NAME is how your server will be displayed in the server list.
HUB_USERNAME you provided while interviewed to be whitelisted on Discord.
HUB_PASSWORD is the token you got back in the same interview.
labels key is to give Portainer control over this container. Learn about Portainer in the next optional step.
volumes mounts folders and files in your filesystem to the container. This will allow the containerised game to store persistent information, such as config files, admins, whitelist, bans, etc.There are many files you might be interested in mounting and we will expand on them later on this guide.
Running the server
From the same folder as your docker-compose.yml file, run the following command:
docker compose up -d
This command will download everything you need, run and publish the server! You will be able to join it as soon as the server is done loading. If you want to stop the server, you can use
docker compose downPretty simple, isn't it?
Installing Portainer
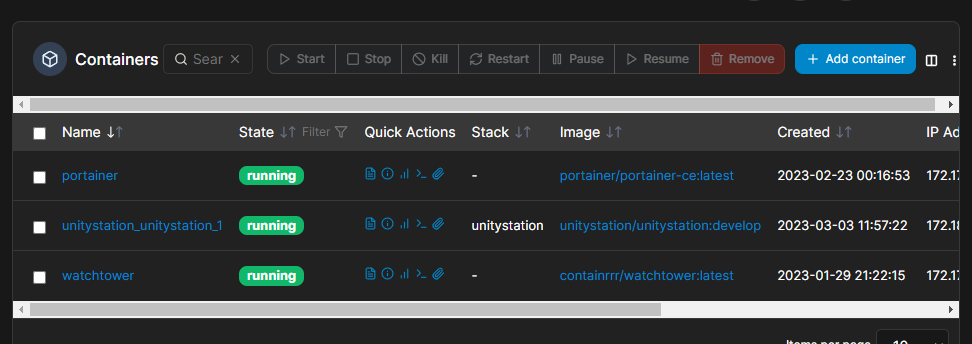
Portainer is another container that will host a web interface to manage your containers. From here you can easily start, stop, update your Unitystation servers just by clicking buttons.
To install Portainer, read their official guide. By the end, you will have a graphical interface that looks like this:

Pretty convenient, isn't it?
Further managing your server
At this point, you should have a running server and be able to join it. If you experience any issue, don't hesitate to ask on our discord help or developer channel.
Now you possibly want to further manage your server, change config files, add admins, etc. Please refer to the following page to read more about it.