How to Download
Unitystation typically only takes a few moments to download and start playing. If you are having trouble or are confused this guide should help clear things up.
The Stationhub
Unitystation the game is launched through a launcher called the Stationhub. When downloading you will be installing the Stationhub, this launcher allows you to see a list of all the public servers and download the builds or forks they are using from there and join them. The Stationhub is also a good way to keep track of Unitystation news under the "News" tab.
Downloading through the Unitystation Website
The first way to download Unitystation is through the website (linked above). Clicking the download button on the homepage will automatically read which operating system you are using and start to install the correct version of it.
Steps for Windows
After clicking download from the website a zipped folder should begin to install.
Once the folder is finished downloading you will want to open it up and extract it to wherever you want the files to be kept.
After that you should be done installing the Stationhub, I recommend making a shortcut and moving it to wherever you keep your games for easier access.
Double-click the StationHub.exe and it will open.
Steps for Mac
Work in progress
Steps for Linux
Work in progress
How to Start Playing after having the StationHub
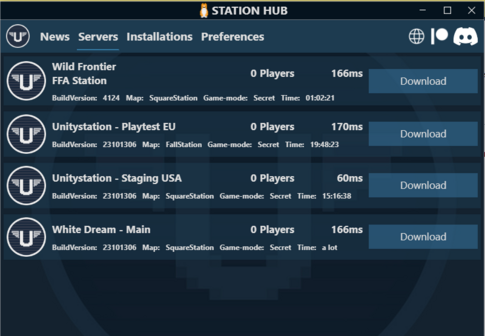
Once you've opened the StationHub for the first time it should look something like this:

To join a server you will want to press the "Download" next to the server you would like to join.
Once the download is complete you have downloaded the current build the server is using, you can also open the build directly under "Installations" at the top.
A brief overview of current servers:
Wild Frontier FFA Station: Free for All server that hasn't been played or updated in years, it uses a very outdated build.
Unitystation - Playtest EU and USA: These are the staging builds that use the most recent builds and are for testing, they are the ones played on during weekly playtests.
White Dream - Main: This is a Russian server that uses the staging builds.
Overview of the tabs on top:
News: Displays the changelog and blog posts.
Installations: A list of all of the builds you have installed and allows you to delete them or launch from them directly.
Preferences: This lets you change the installation path you have set for the different builds.
How to Join a Server
Once you've installed the build related to a server click "Start" to launch the game and automatically connect to the server.
Creating an Account

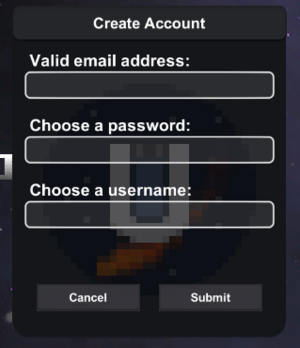
You will be prompted to a login box, instead press "Create".
You will need to fill in a valid email address, a password for your account, and a username.
Once you click submit an email will be sent to the email address you provided click the link in the email that was sent and your account will be verified.
Then back in the game press back and log in with the account you just created. (make sure to click the Auto login button as it will make it easier in the future.)
There you should be signed in and join the game!
(You may need to close out the game and rejoin a server if it is stuck signing you in.)
Then you should simply press character, and create a new character if you need help use the Character Creation Guide.
After than join the server and you'll be in the game, have fun!